AI Configuration: Connecting Your AI Providers
Connect one or more AI providers (OpenAI, Claude, DeepSeek, Gemini), understand the three kinds of AI — text, image analysis and image generation — and run them together using Selection rank.
SMTasker doesn’t bundle a shared AI service. Instead, you connect your own AI providers under Settings → AI, using API keys you generate yourself. What’s new is that you can connect several providers at once — OpenAI, Claude, DeepSeek and Gemini — and SMTasker spreads the work across all of them. This guide explains the three kinds of AI, how to connect a provider, and how to run several together with Selection rank.
The three kinds of AI
Every provider card lists which capabilities it supports. There are three, and they map to different things SMTasker does for you:
- Text — the AI writes. This powers AI comments in the Comment tool and AI captions in the Publish tool.
- Image analysis — the AI looks at an image and understands it. Two places use it today: the Follow tool’s “Filter with AI” (see below), and “AI for image” captions that write a post caption from the image itself (the
[AIPROMPT_FORIMAGES]token — see Managing Media Folders). - Image generation — the AI creates images. This powers the AI Content tab. OpenAI is currently the only provider that offers image generation, so those jobs always use OpenAI.
Where image-analysis AI shows up today: the Follow tool
Open an Instagram Follow automation → Settings → Filter based on profile data, and tick Filter with AI. You write a plain-English rule, and the AI checks each candidate against it — including looking at their profile picture — before following.
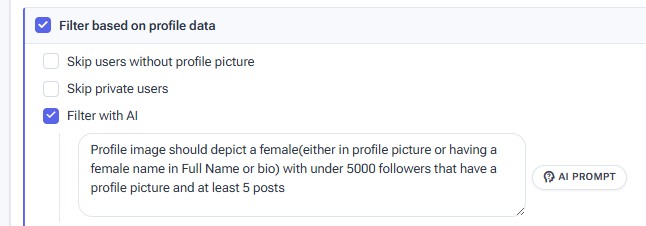
“Filter with AI” in the Follow tool — the prompt can reference the profile image itself, which is what image-analysis AI makes possible.
The AI providers
Under Settings → AI, each provider is a card you switch on with a checkbox, then give your own API key. You can enable as many as you like.
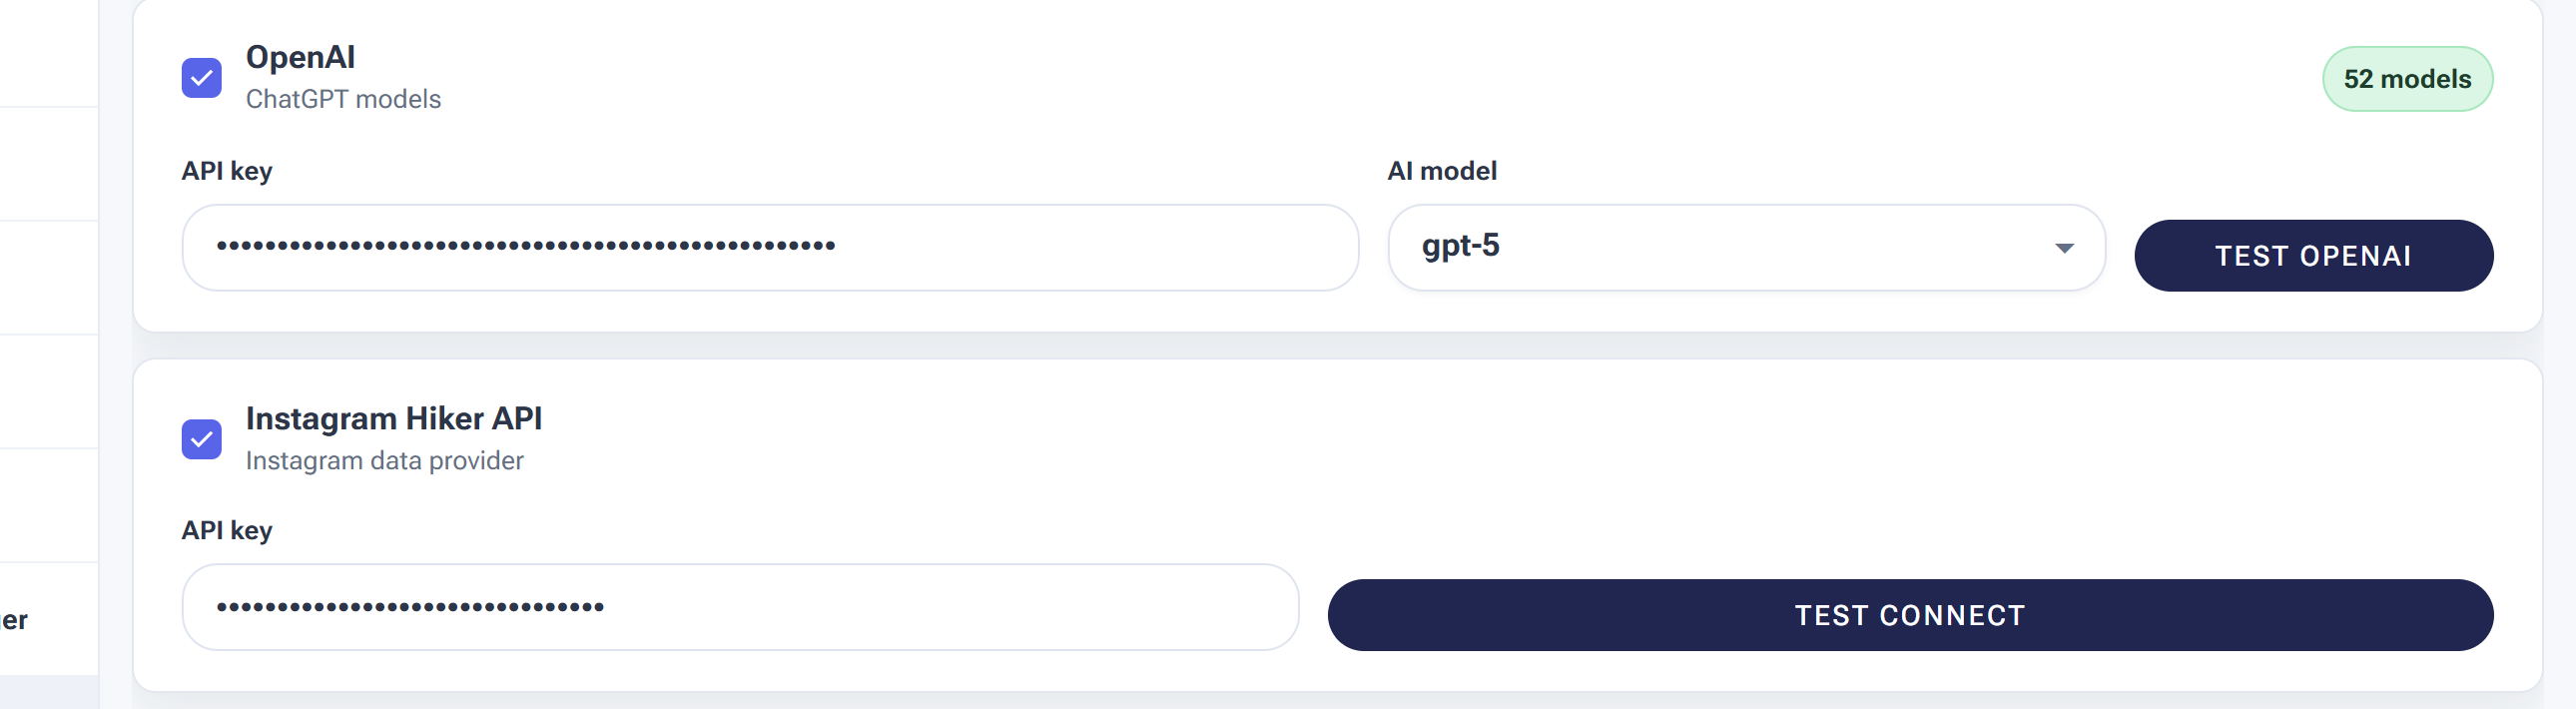
The Settings → AI tab. Each provider shows its capabilities, an API key, a model picker, and its Selection rank / Max concurrent controls.
| Provider | Capabilities | Notes |
|---|---|---|
| OpenAI | Text · Image analysis · Image generation | General-purpose, and the only image-generation provider. Widest model choice. |
| Claude | Text · Image analysis | Strong text and visual understanding. |
| DeepSeek | Text only | Cost-efficient text processing. |
| Gemini 3.5 Flash-Lite | Text · Image analysis | Low cost — flagged in-app as the lowest-cost image analysis option. |
| Instagram Hiker API | Data provider (not AI) | Optional. Adds richer account/post data for smarter targeting. Paste its key and press Test Connect. |
Connecting a provider
The flow is the same for every provider:
- Open the SMTasker dashboard → Settings → the AI tab.
- Tick the checkbox on the provider’s card to enable it.
- Paste your API key into that card.
- Choose a Model from the picker (each provider offers its own list).
- Click Test Connection to confirm the key works.
Your key comes from that provider’s own developer console — the OpenAI platform for OpenAI, the Anthropic Console for Claude, Google AI Studio for Gemini, and the DeepSeek platform for DeepSeek. The OpenAI walkthrough below shows the pattern; the others work the same way.
Example: getting an OpenAI key
- Log in at platform.openai.com (create an account if you don’t have one).
- Make sure billing is set up — API usage needs a payment method under Settings > Billing. New accounts get a small free credit.
- Go to API keys (profile icon → API keys, or platform.openai.com/api-keys).
- Click Create new secret key, name it “SMTasker”, and create it.
- Copy the key immediately — OpenAI only shows it once. Paste it into the OpenAI card in SMTasker and press Test Connection.
Using several at once: Selection rank & Max concurrent
This is the point of connecting more than one provider. When several enabled providers can all do a job (say, writing comments), SMTasker doesn’t just pick one — it shares the work across them. Two per-provider controls shape how:
- Selection rank — “When queue loads are equal, providers with a higher rank are selected more often.” Think of it as a weight: raise a provider’s rank and more of the work goes to it; lower it and it’s used less. Every provider starts at rank
1(equal share). - Max concurrent — “Requests beyond this provider-specific limit wait in its queue.” This caps how many requests that provider handles at the same time; anything over the cap simply queues for it.
So the two work together: Max concurrent sets each provider’s capacity, and Selection rank decides who gets picked when their queues are evenly loaded.
Models & what it costs
Each provider has its own model picker (OpenAI, for example, exposes dozens of models). Because you connect your own key for each provider, you pay that provider directly for what you use — there’s no SMTasker AI fee on top. That gives you three things:
- Cost control — you only pay for what you use, and you can set spending limits in each provider’s own dashboard.
- Model flexibility — switch models (or providers) as new ones ship, without waiting on SMTasker.
- Privacy — your prompts and usage stay inside your own provider accounts.
For typical automation volumes the cost is low — a lighter, cheaper model handling most of your comment volume usually runs a few dollars a month. Set a monthly limit in each provider’s dashboard so a misconfiguration can never produce a surprise bill.
Troubleshooting
| Issue | Likely cause | Fix |
|---|---|---|
| AI features aren’t running (comments fall back to templates, captions don’t generate) | No provider with the needed capability is enabled, or its key isn’t saving | In Settings > AI, confirm at least one provider is ticked, its key is pasted, and Test Connection passes. |
| “Invalid API key” on Test Connection | Key copied incorrectly, or revoked in the provider’s console | Re-copy the key from that provider’s console; if it was revoked, create a new one and paste it again. |
| “Quota exceeded” / billing error | That provider’s account has no credit or hit its limit | Add credit or raise the spending limit in that provider’s billing page. |
| AI image generation does nothing | OpenAI isn’t connected | Image generation only works through OpenAI — enable it and test the key. |
| One provider is slow or keeps erroring | It’s rate-limited or having an outage | Enable a second provider for the same capability — SMTasker will keep the queue moving through the others. |
| Filter with AI option is missing | The automation isn’t Instagram | AI profile filtering in the Follow tool is Instagram-only for now. |