2- Create your SMTasker account
Sign up, choose your plan, start the 5-day free trial, and open the app — the whole account setup takes about five minutes.
Prefer to watch? The full signup walkthrough is on our YouTube channel — the written steps below match it exactly.
Your SMTasker account is your cloud dashboard — it’s where you connect phones, add social accounts, and run automations. Creating it takes about five minutes: you’ll pick a plan, start a 5-day free trial, complete a secure checkout, and open the app. This guide walks through every step.
Before you start
- An email you can access. Your login details are sent here, so use a real inbox.
- A payment method — a card or PayPal. You are not charged during the 5-day free trial; your first payment is only scheduled after the trial, and you can cancel anytime before it ends.
- Know how many phones you’ll run. Your plan is sized by the number of connected devices (see Step 3) — you can start small and upgrade later.
Step 1: Go to smtasker.com
Open your browser and visit smtasker.com. This is the public site where you’ll start the sign-up.
Step 2: Click “Get Started”
On the homepage, click the Get Started button (top-right, and again in the hero section). This takes you to the pricing page where you choose your plan.
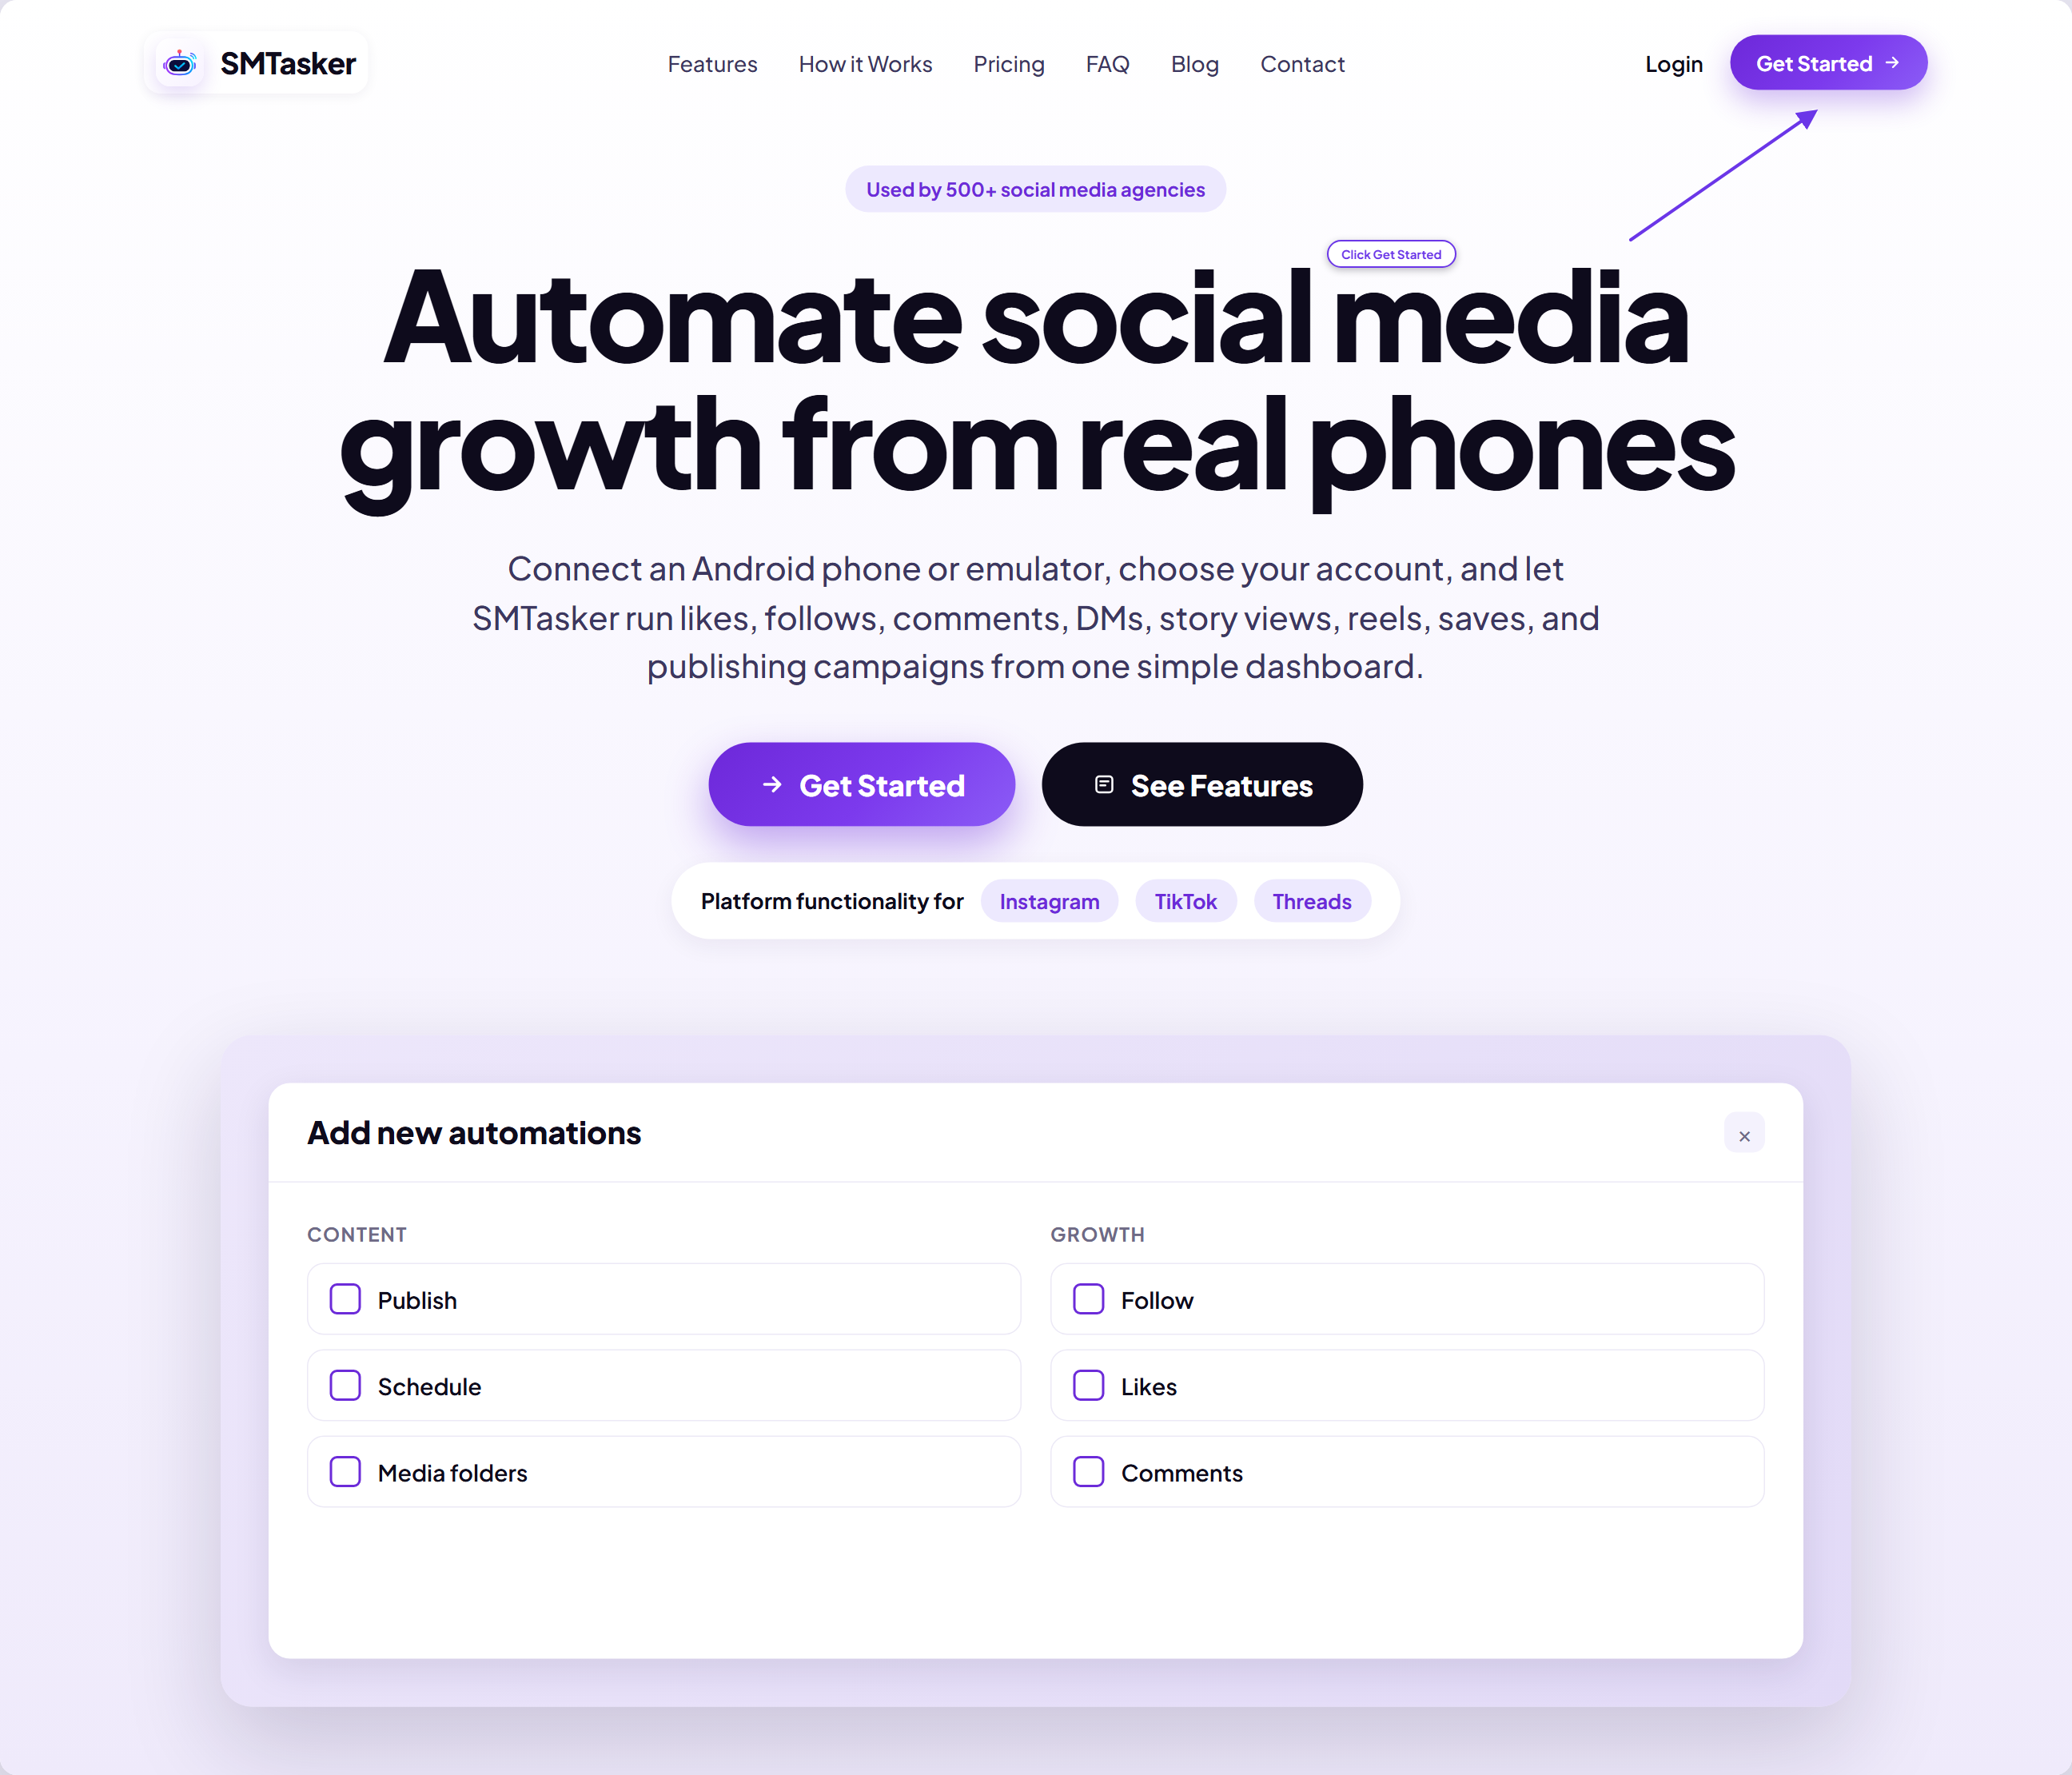
The SMTasker homepage — click Get Started to begin.
Step 3: Choose your plan
Pick the plan that matches how many phones you’ll connect. Use the Monthly / Yearly toggle at the top to switch billing — Yearly saves 20%. Every plan includes Instagram, TikTok, and Threads support, engagement and publishing automations, safe limits, active days, and live logs.
| Plan | Best for | Connected devices | Accounts per device |
|---|---|---|---|
| Solo | Solo operators | 1 | Up to 5 |
| Growth | Growing agencies | 5 | Up to 7 |
| Agency | Established teams | 15 | Up to 10 |
| Need More? | Larger / custom setups | 15+ (custom) | Custom |
Click Start Free Trial on the plan you want. (This guide follows the Solo plan as an example.)
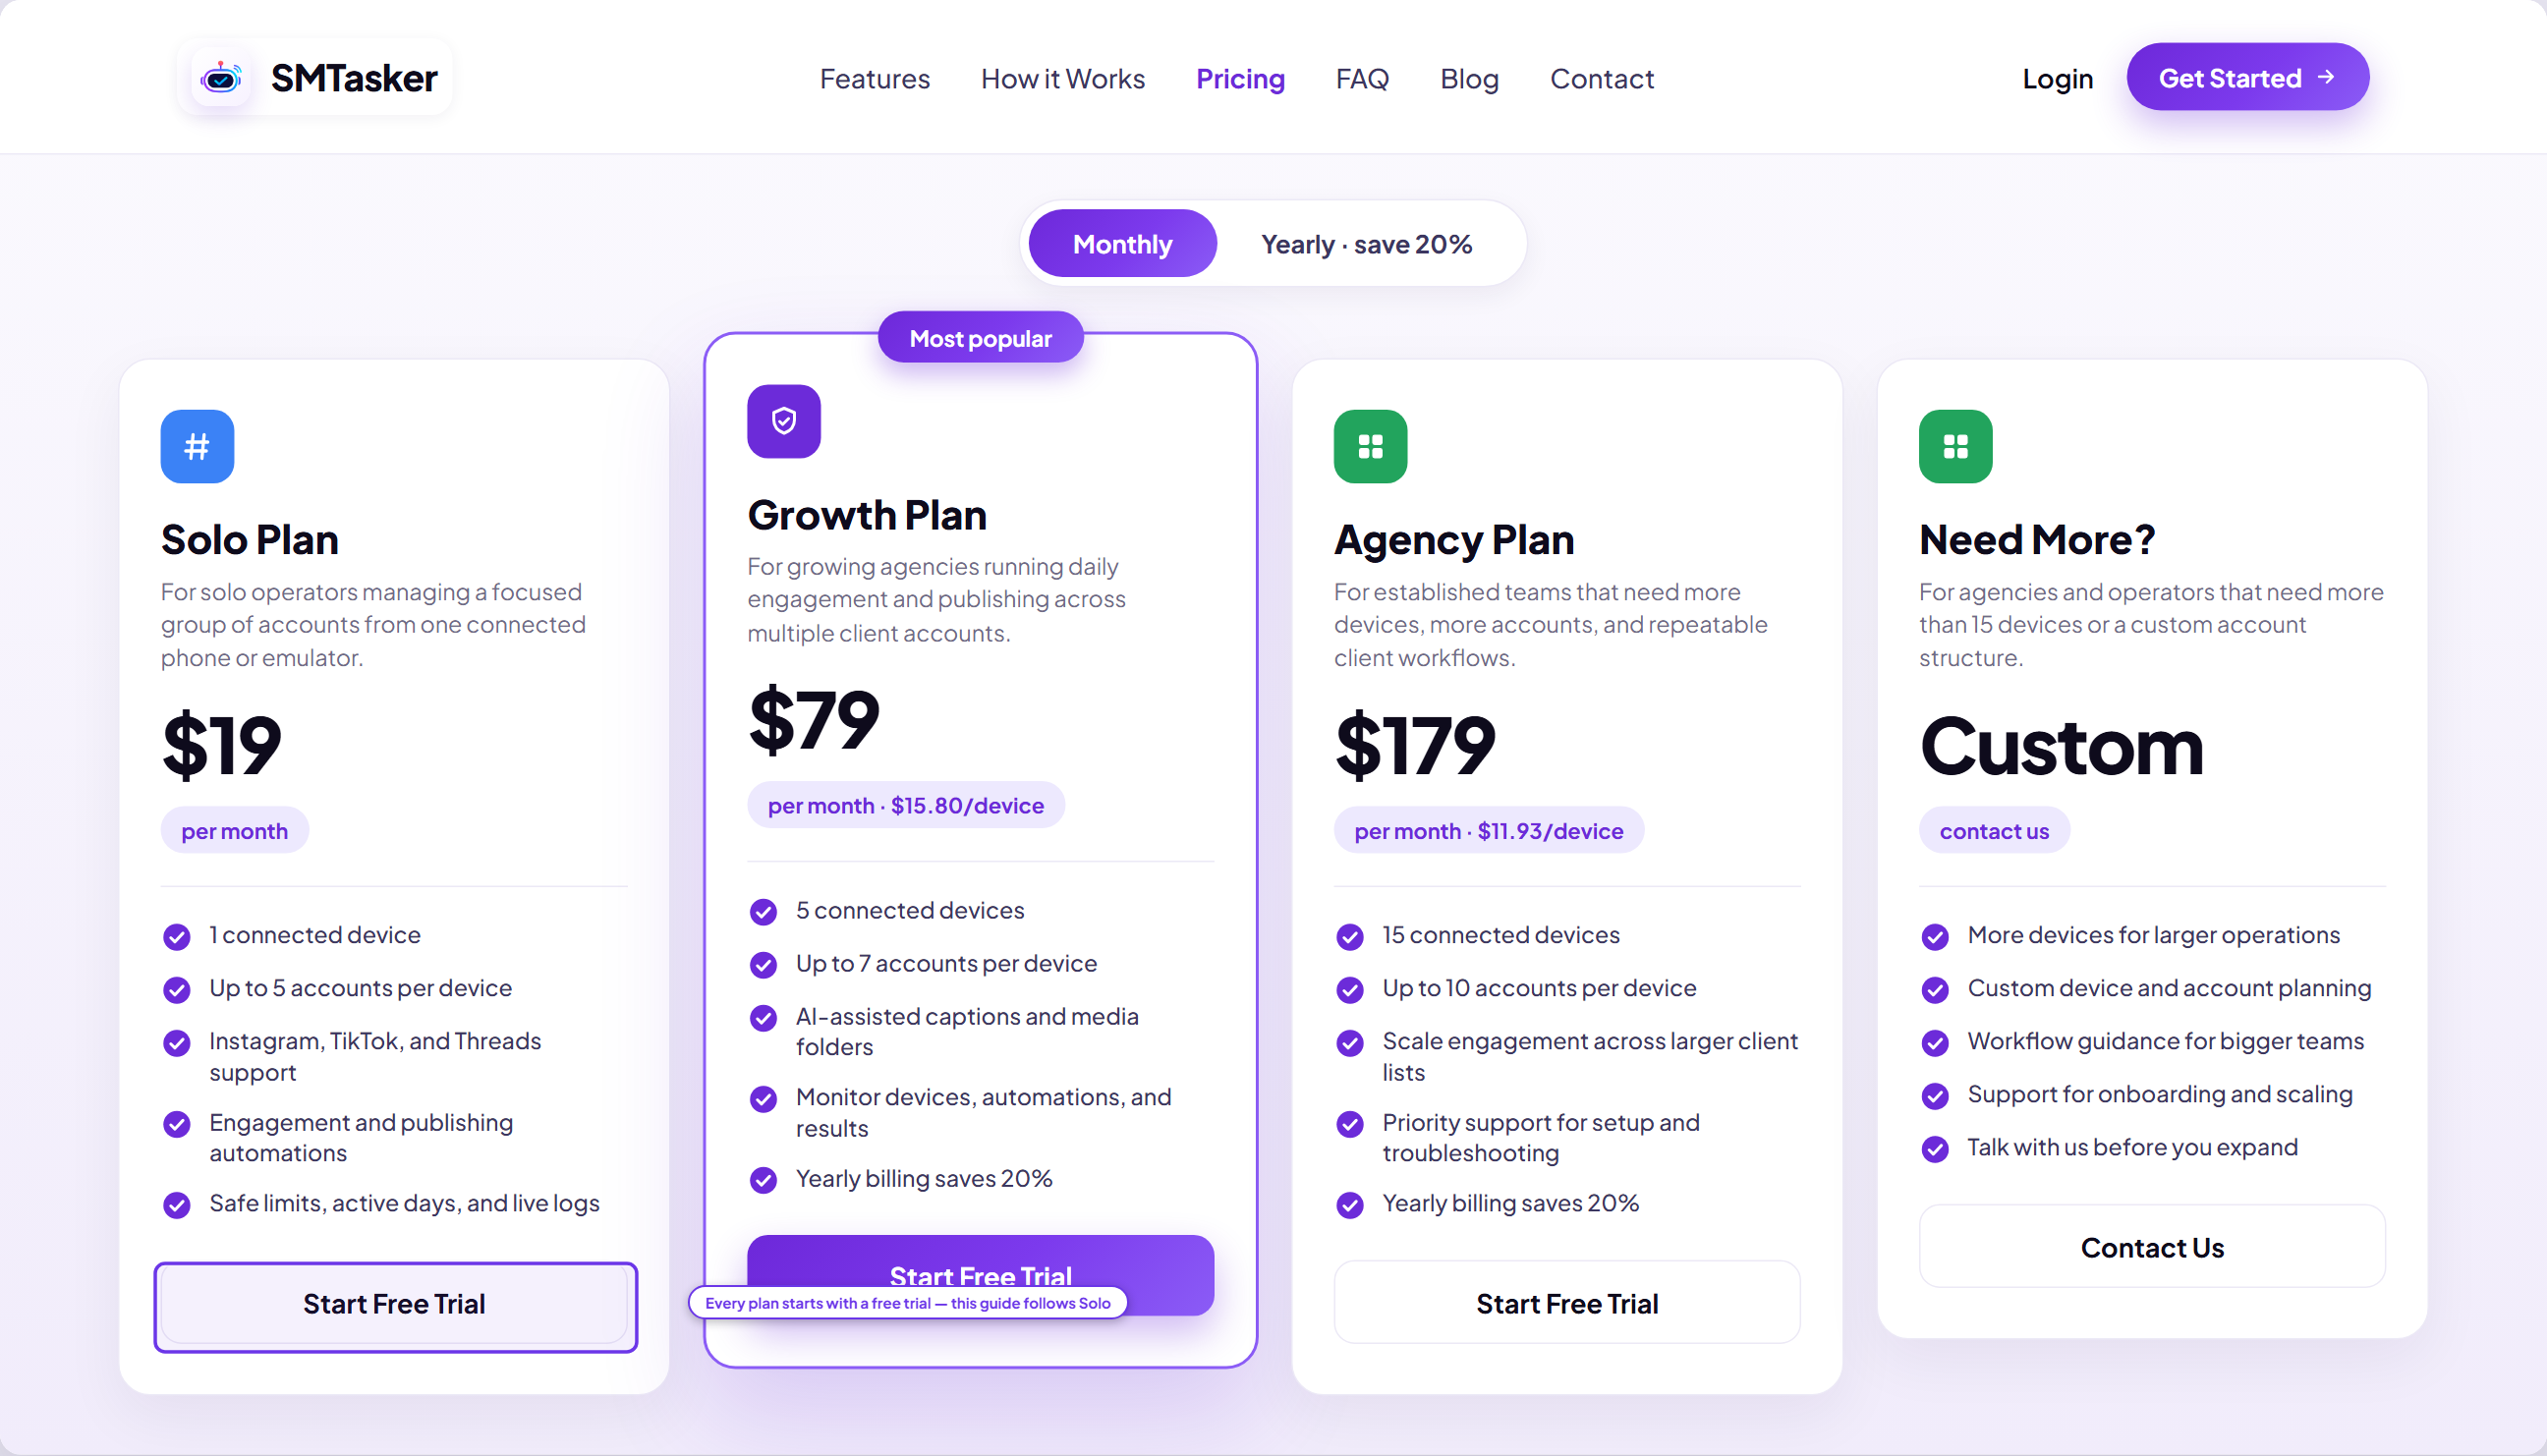
The pricing page — choose a plan and click Start Free Trial.
Step 4: Enter your email and start the trial
A Start free trial window appears with your plan summary. Fill in:
- Email — the address for your account.
- Confirm Email — type it again to be sure.
- Tick the box to accept the Terms of Service & Privacy Policy.
Then click Start Free Trial.
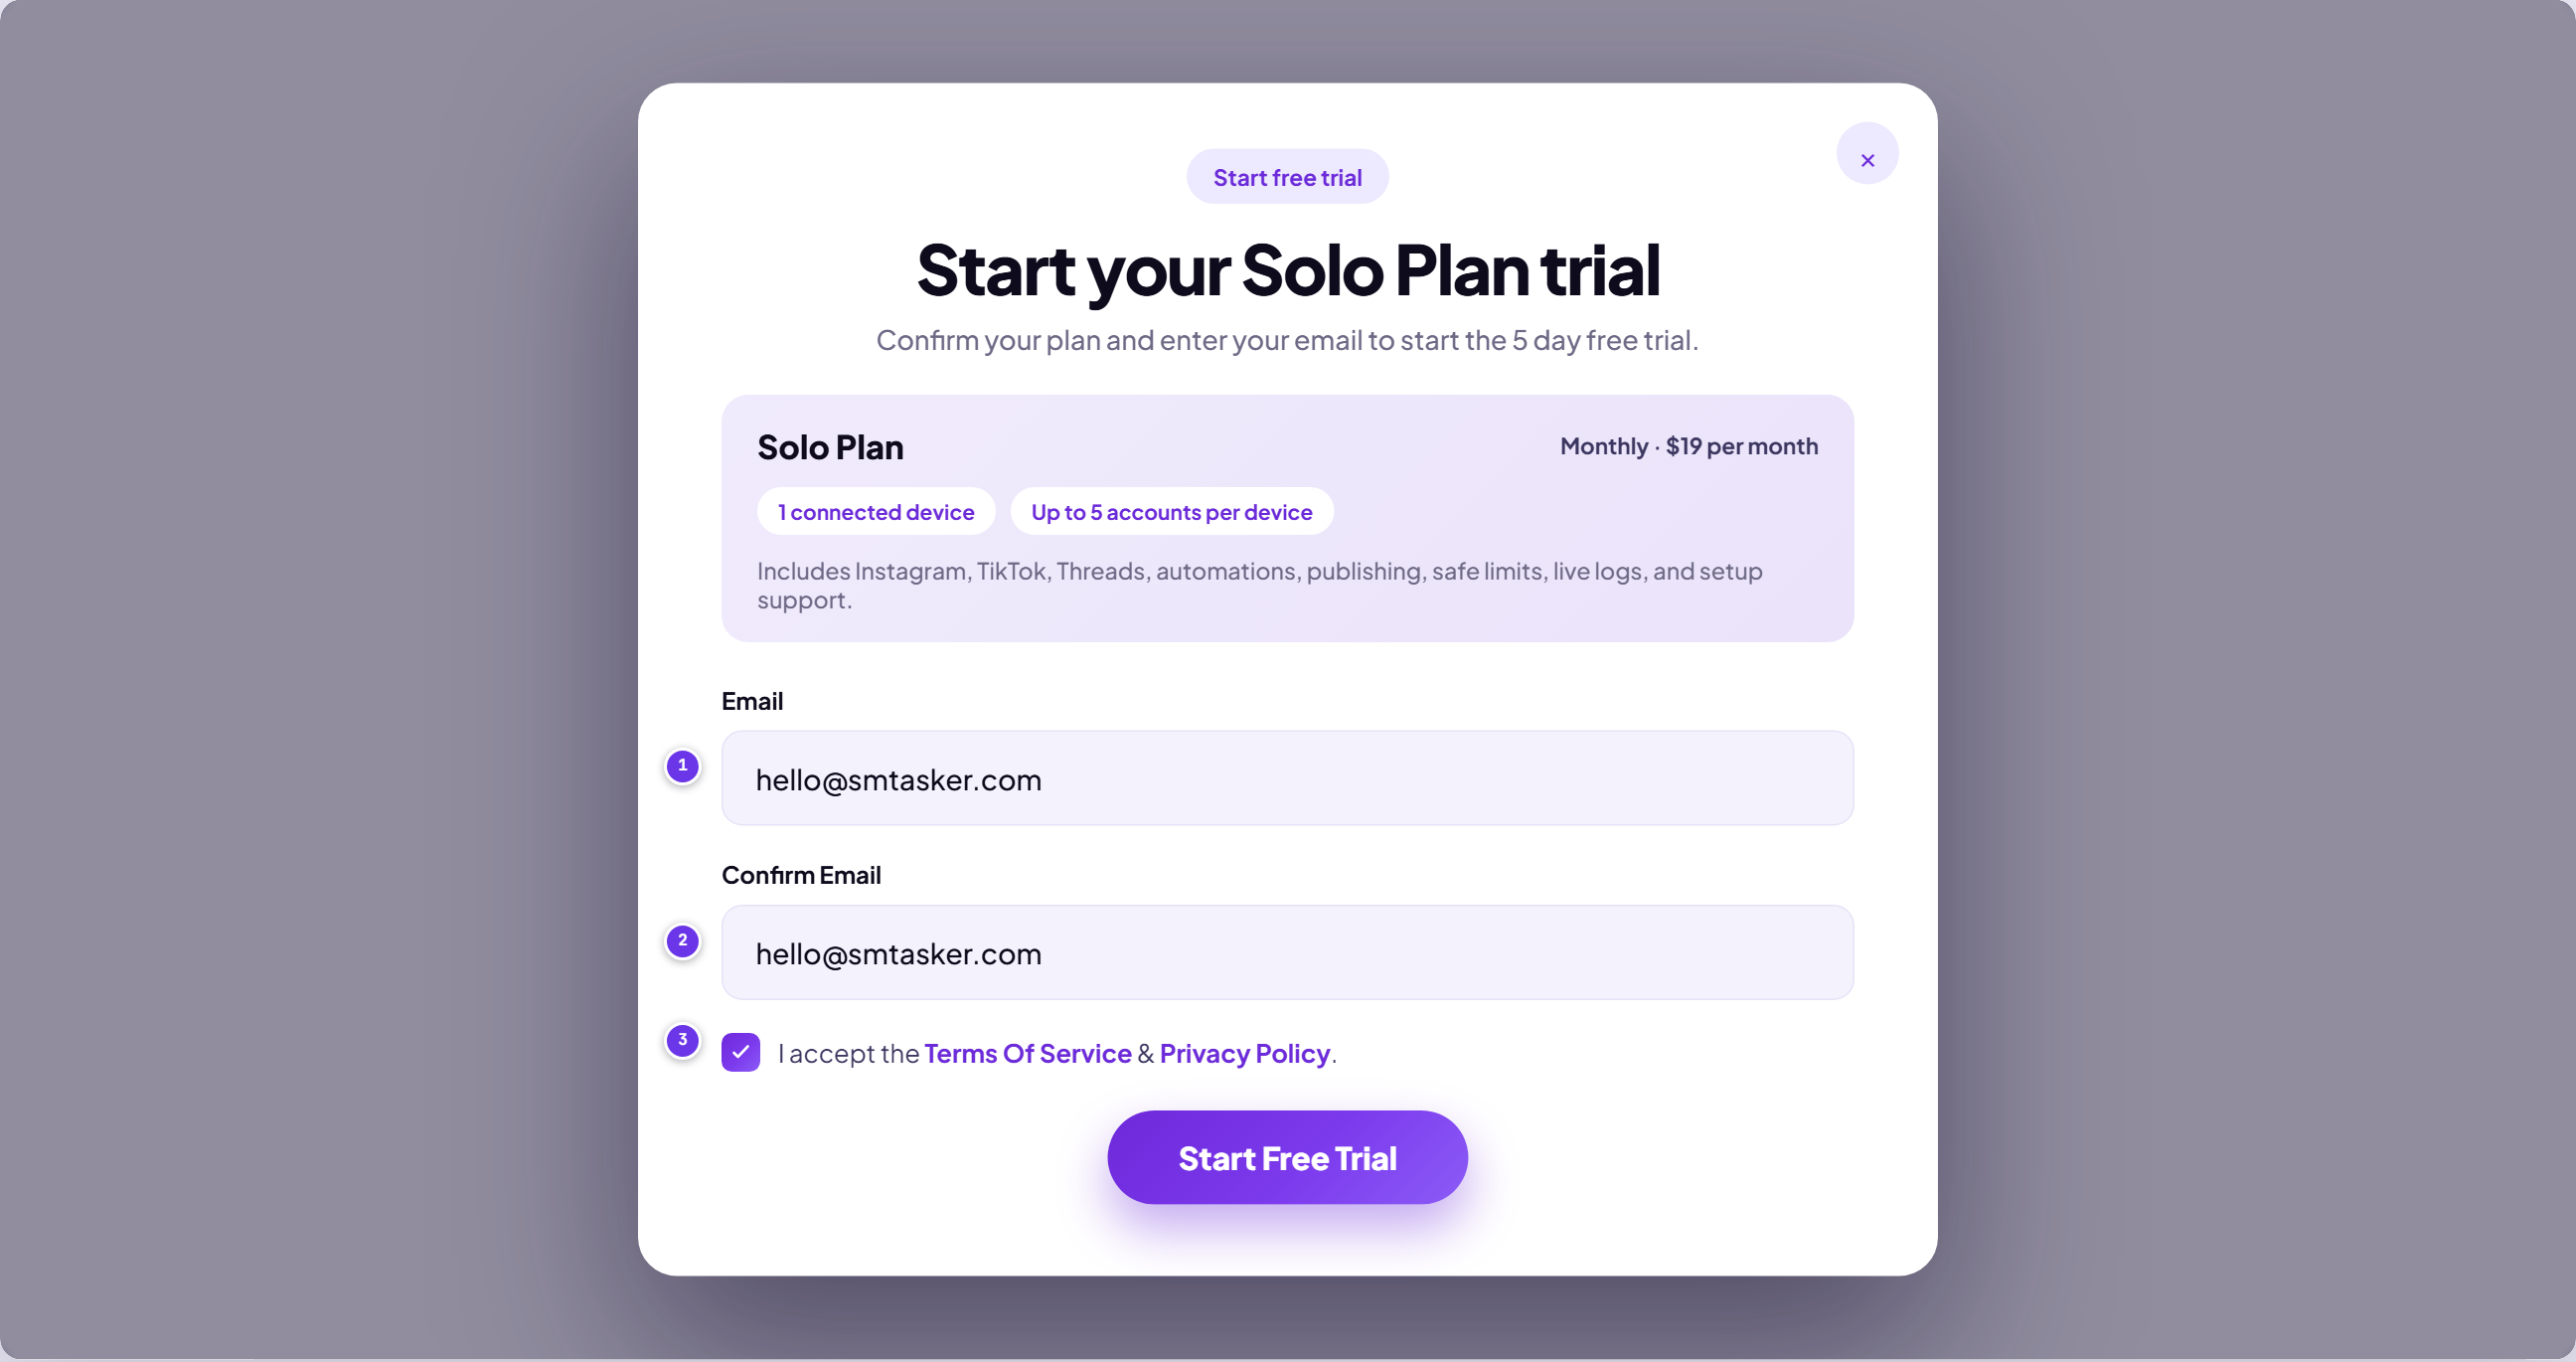
The Start free trial window — email (1), confirm email (2), accept the terms (3).
Step 5: Review and start your subscription
Next you’ll see the Start your 5-day free trial page. It confirms your account email, the selected plan (e.g. Solo / 1 device), and the amounts — Due today: €0.00, with the recurring price shown as after trial. A monthly subscription is created now, but your first payment is only scheduled once the 5-day trial ends (unless you cancel first).
Click Start subscription to continue to secure checkout.
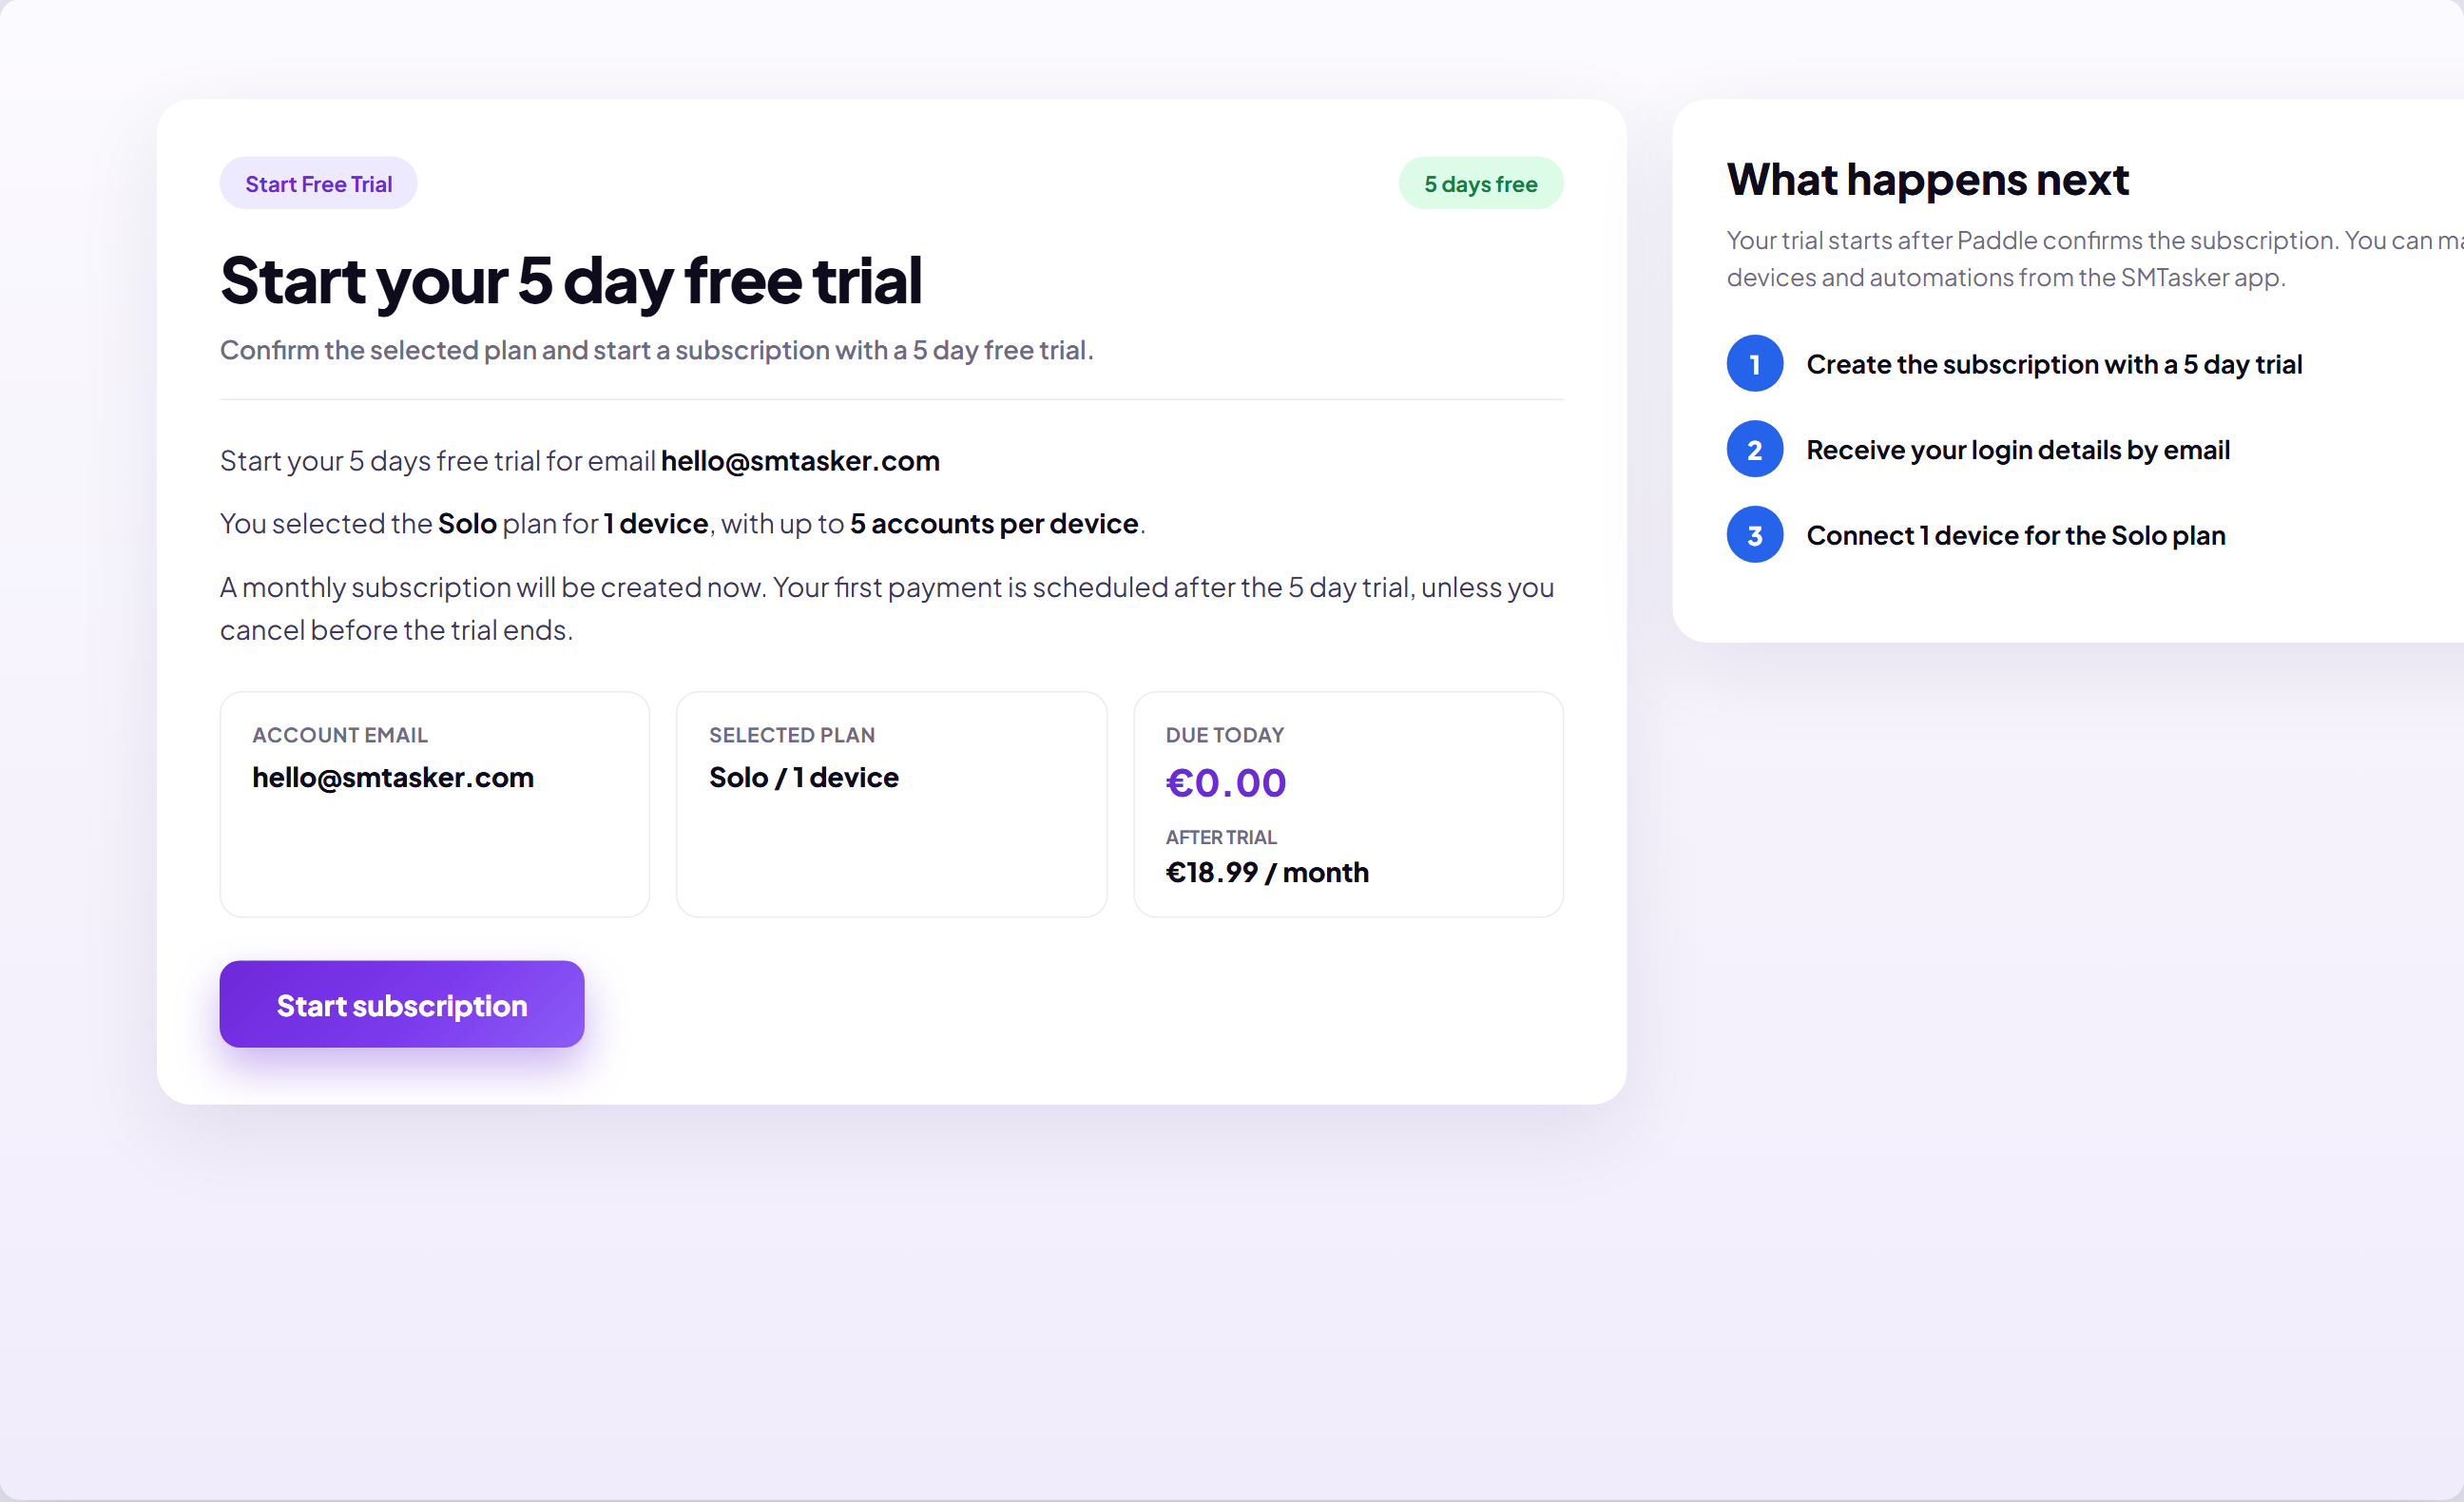
The Start subscription page — review your plan and amounts, then click Start subscription.
Step 6: Complete secure checkout
Checkout is handled securely by Paddle. You can pay with PayPal, or click enter card details and fill in:
- Card number
- Name on card
- Expiration date (MM / YY)
- Security code (CVV)
The order summary again shows 5 days free, then the monthly price, with Due today: €0.00. Click Subscribe now to confirm.
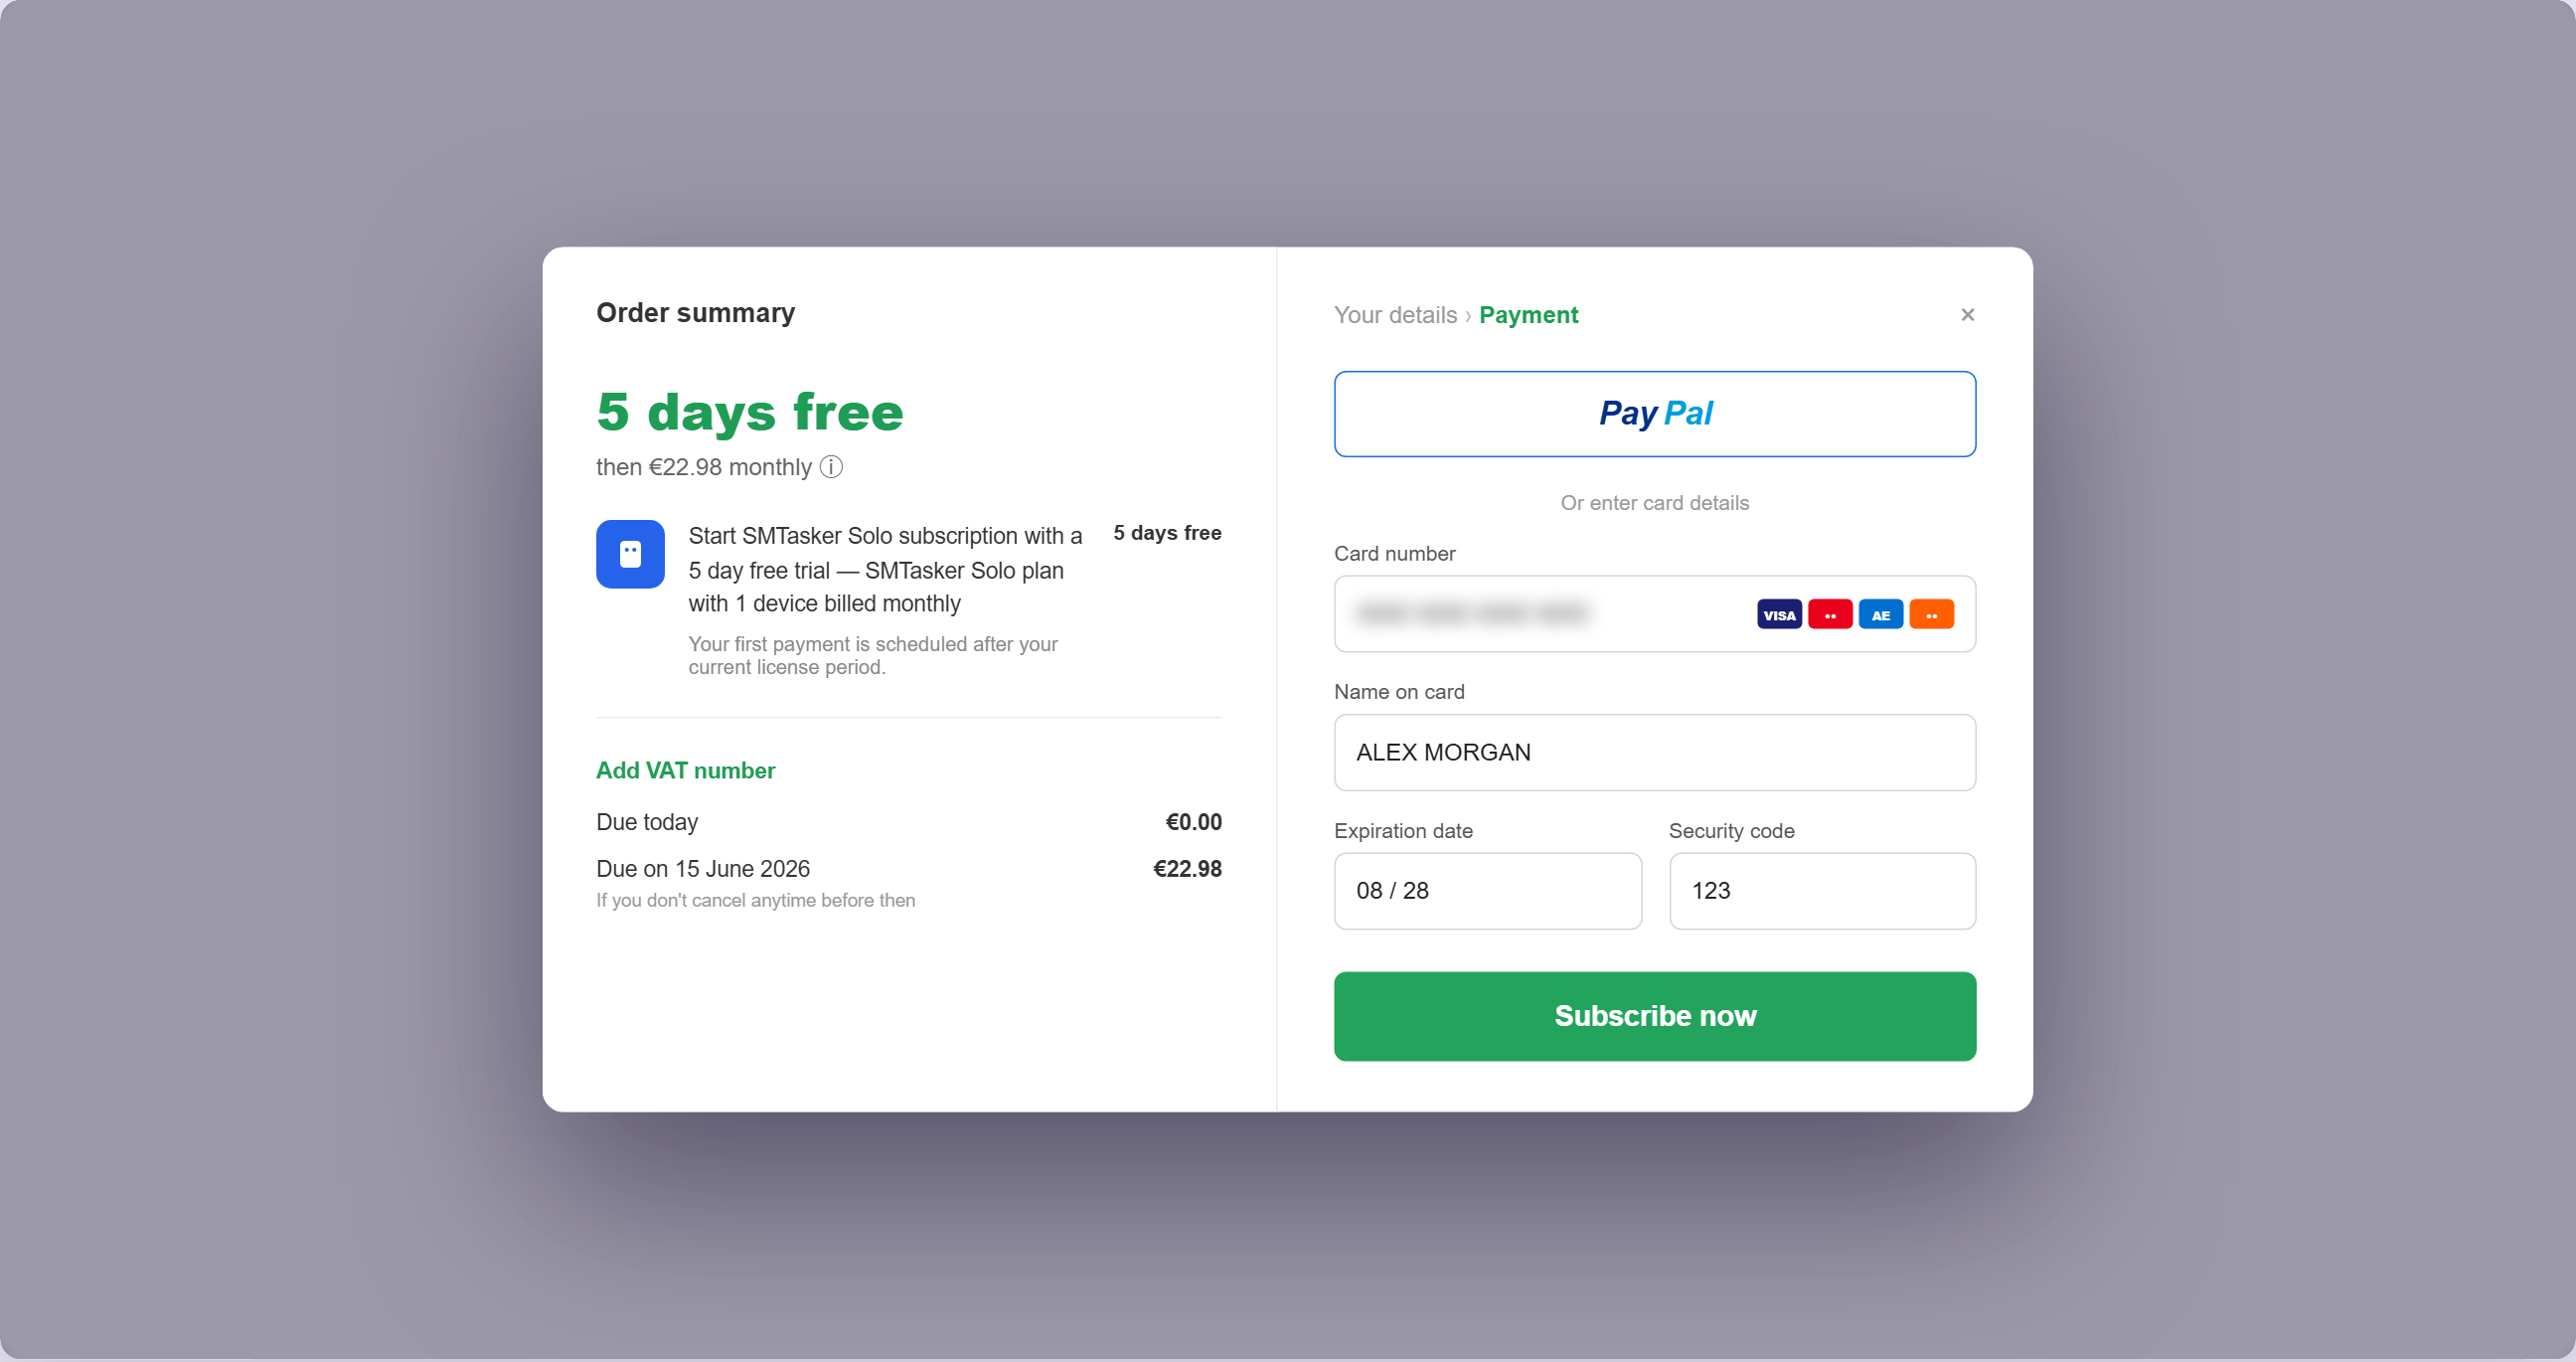
The secure Paddle checkout — PayPal or card details.
Step 7: Wait for activation
After checkout, SMTasker activates your account — this takes a few seconds. Your login details are emailed to you, so keep an eye on your inbox.
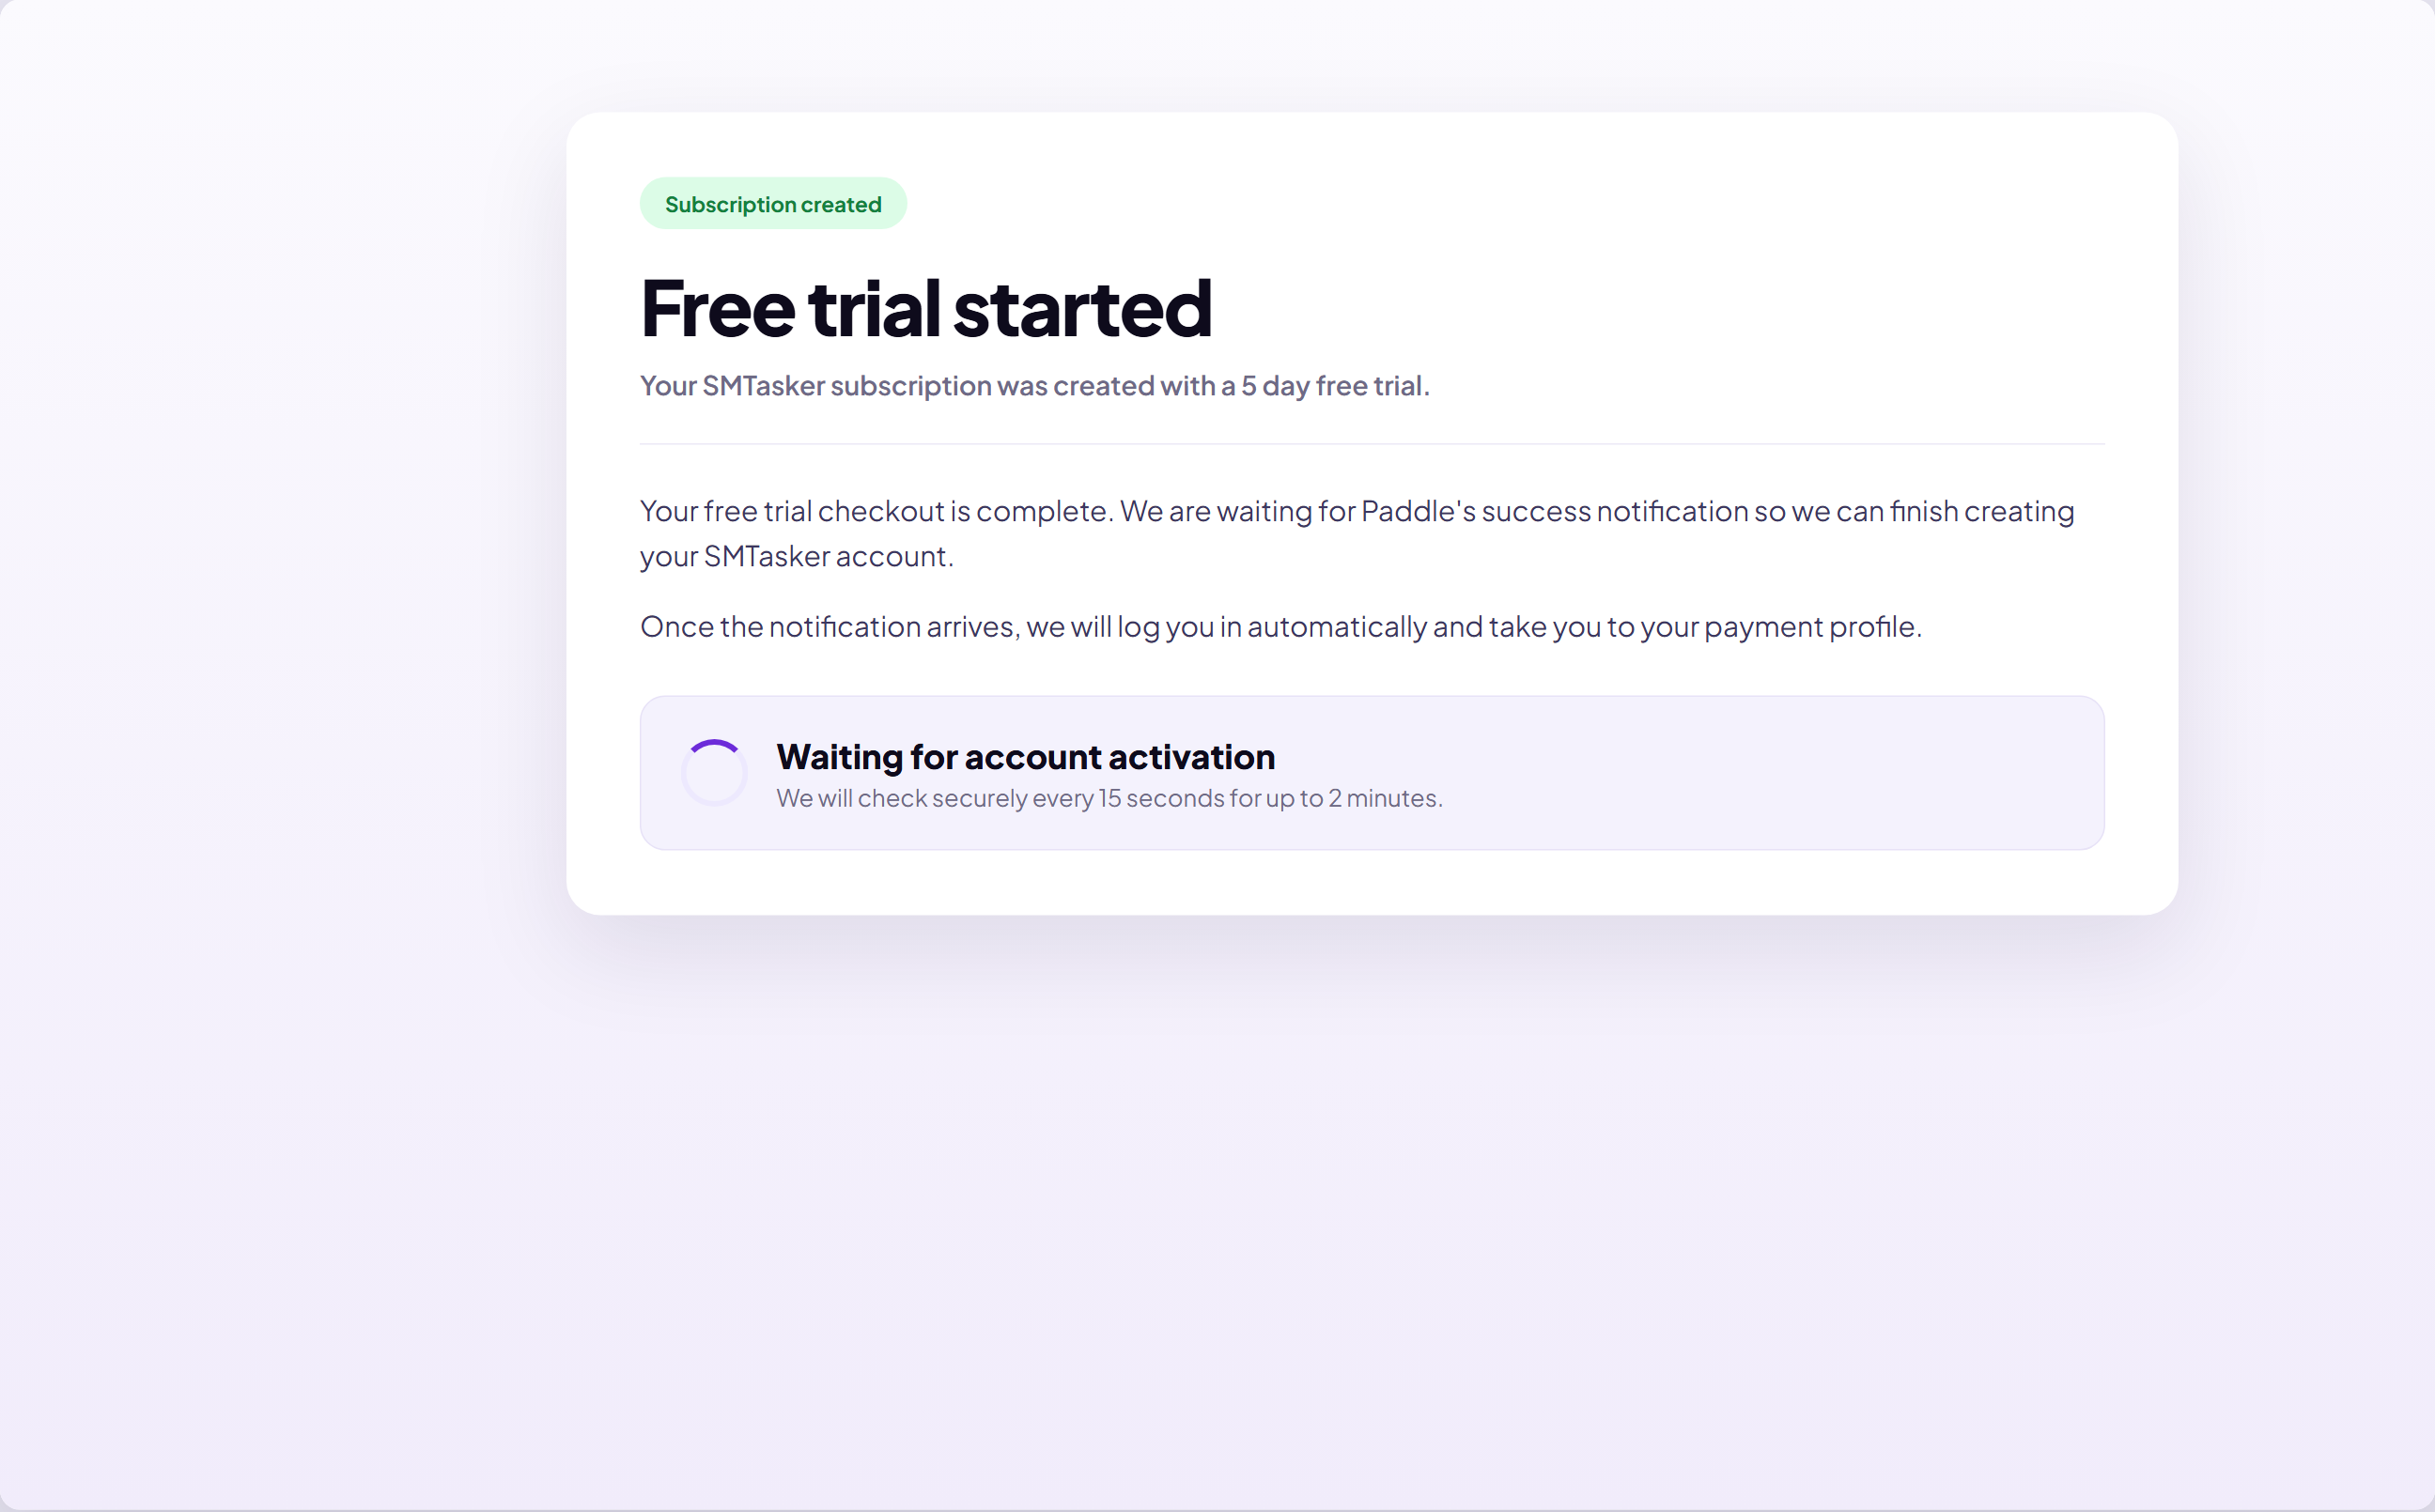
The activation screen — free trial started, waiting for confirmation.
Step 8: Open your dashboard
You’ll land on your account dashboard (Payment Profile). Here you can see your Current Plan, License Status (e.g. FreeTrial), remaining trial days, your next payment date, and your included capacity (number of devices). From the top menu you can also reach Invoices and Change Password.
Click Open App to launch the SMTasker dashboard — the workspace where you’ll connect your phone and set up automations.
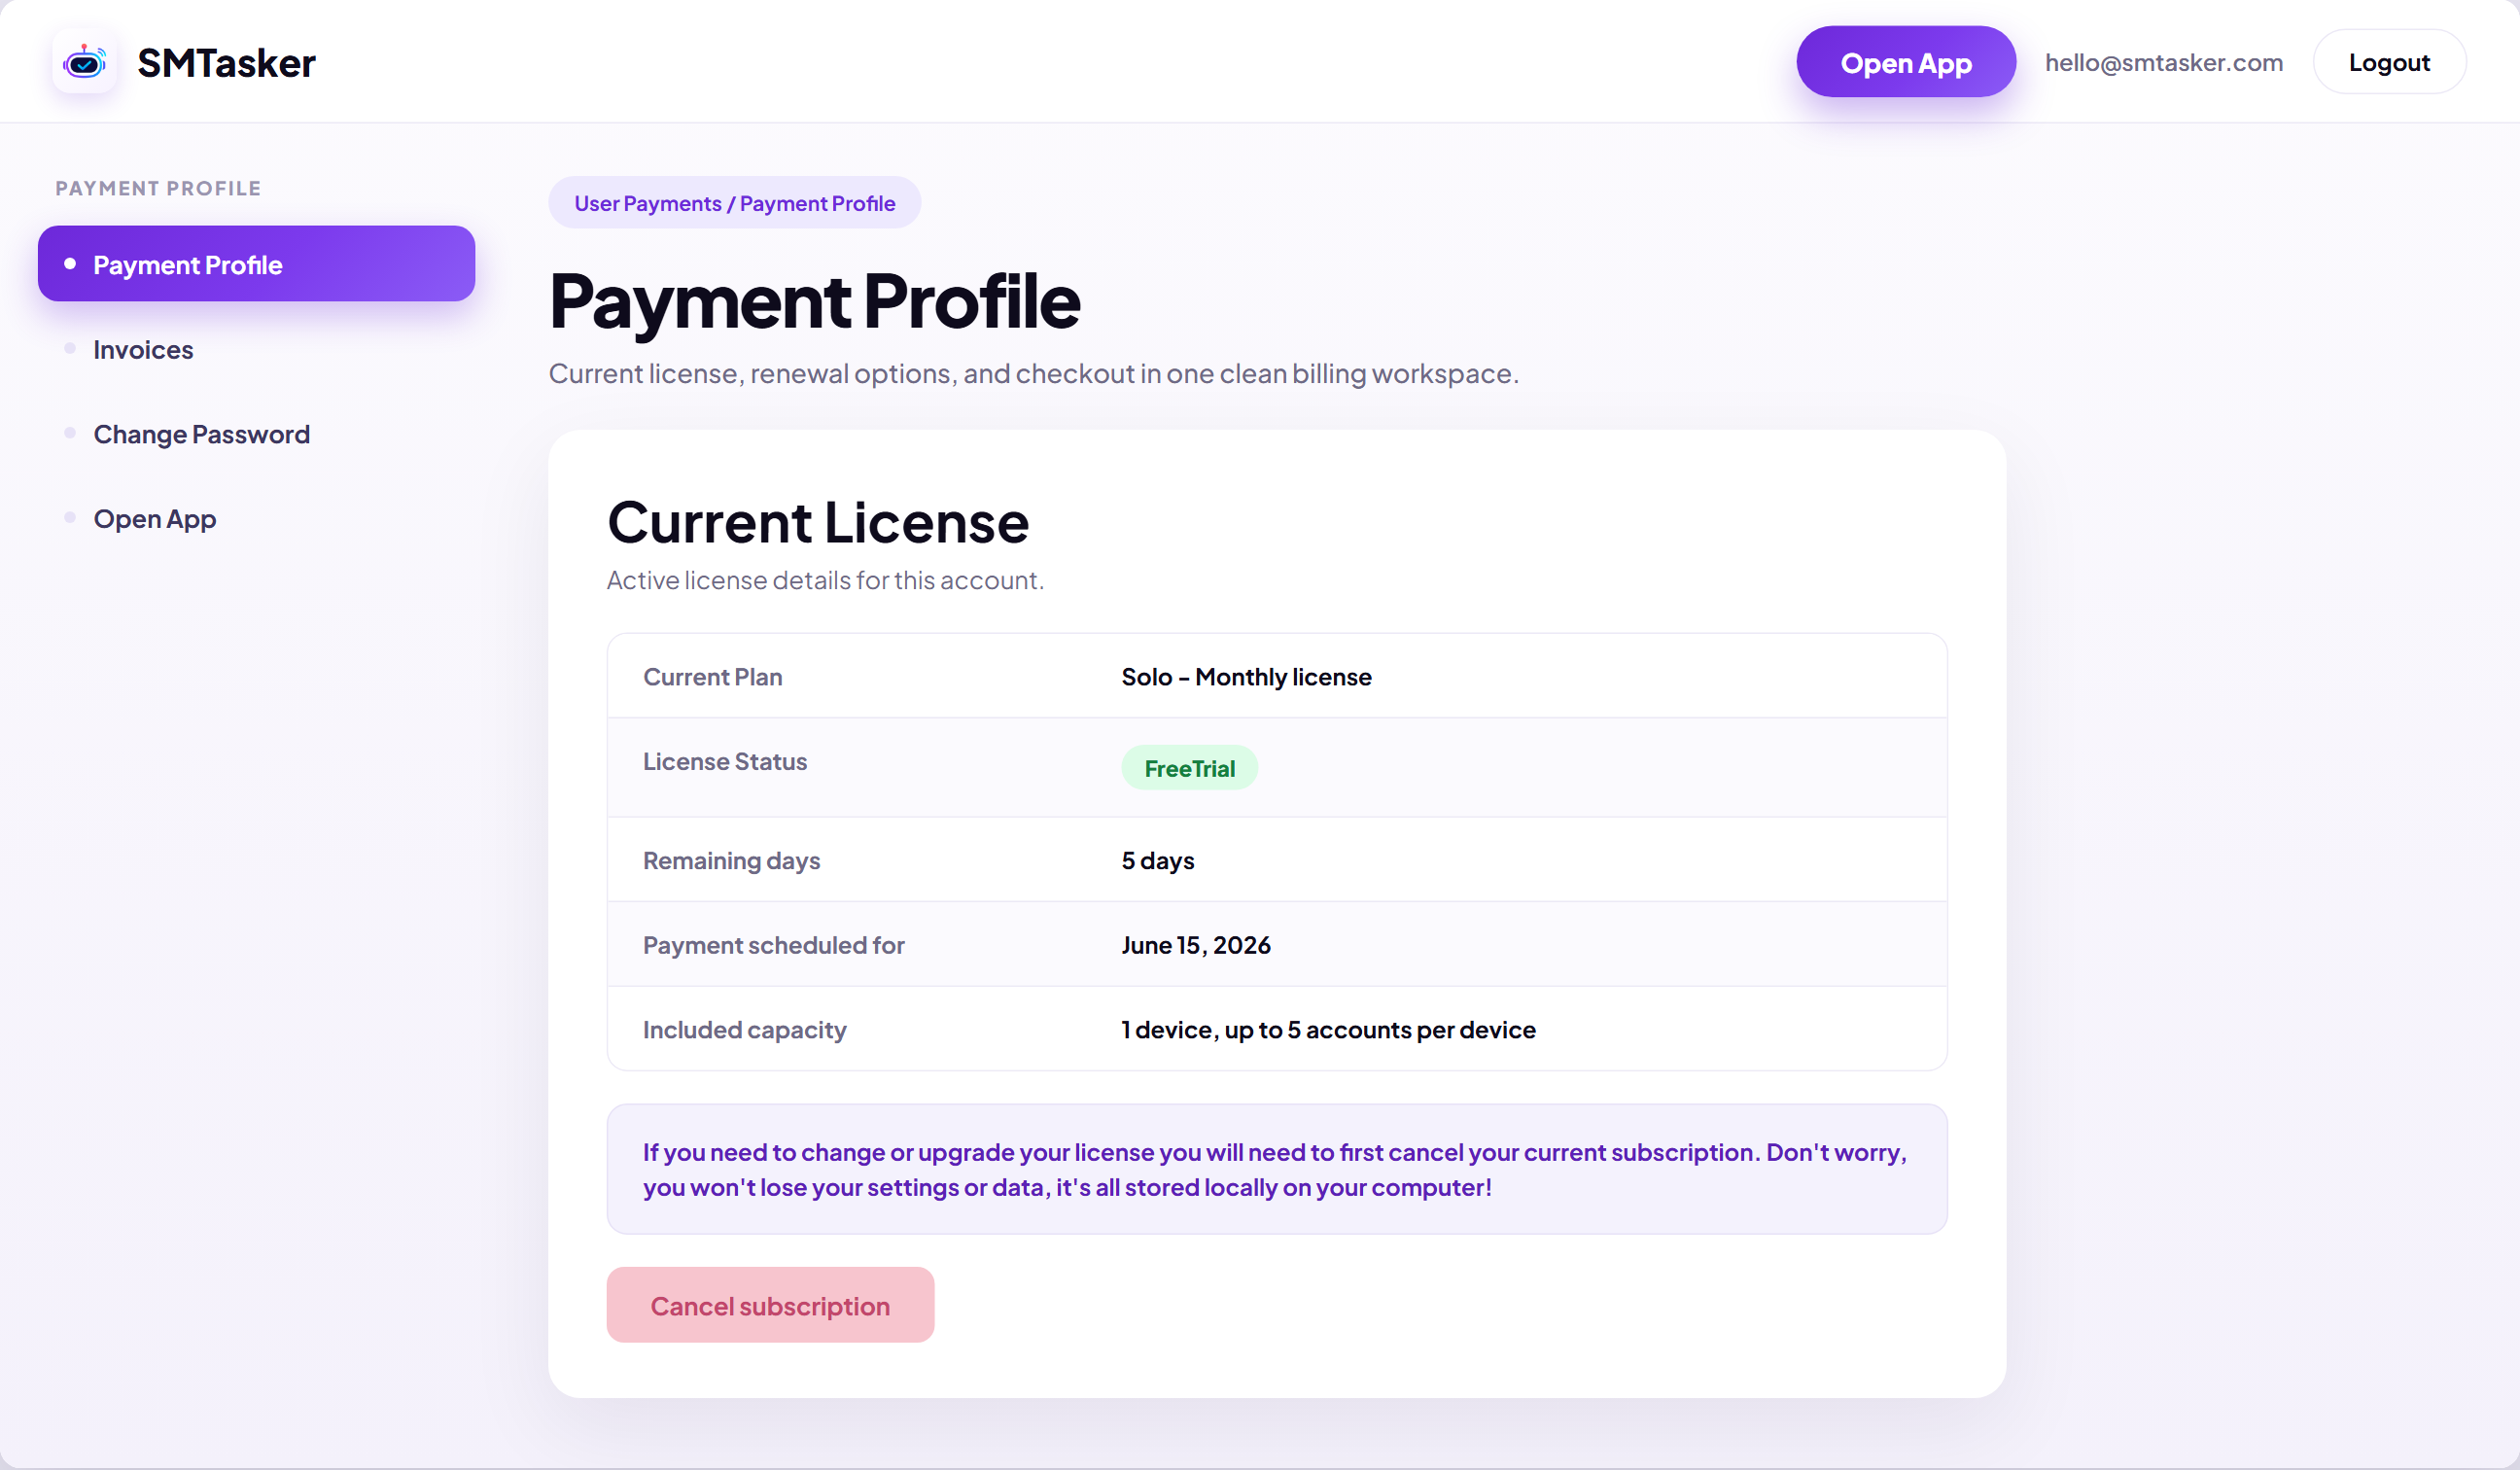
Your account dashboard / Payment Profile — click Open App.
What happens next
Your account is ready. The next step is to install the bridge software that connects your computer and phones to SMTasker — use the Next card below to continue.